
This is an old revision of the document!
Table of Contents
QtTermTCP
QtTermTCP is a software package created by John G8BPQ that acts as a “terminal” for interacting with packet radio stations. It can connect to directly to a BPQ node using FBB over IP, or the more recent beta version supports KISS, both with a directly connected serial TNC or over TCP to something like Dire Wolf.
The following Wiki page covers getting started with QtTermTCP. It assumes you've got a working Radio + TNC setup.
Installation
Windows
The instructions were tested on Windows 11 but presumablys work on other versions. For some reason its a bit of a faff and involves changing permissions possibly due to putting it in Program Files. But where else do you put a program on Windows?
Download QtTermTCP.zip
Extract it, and copy the “release” directory to C://Program Files (x86)/ then rename it to something useful like QTTermTCP. You might occasioanlly get prompted for administrator access.
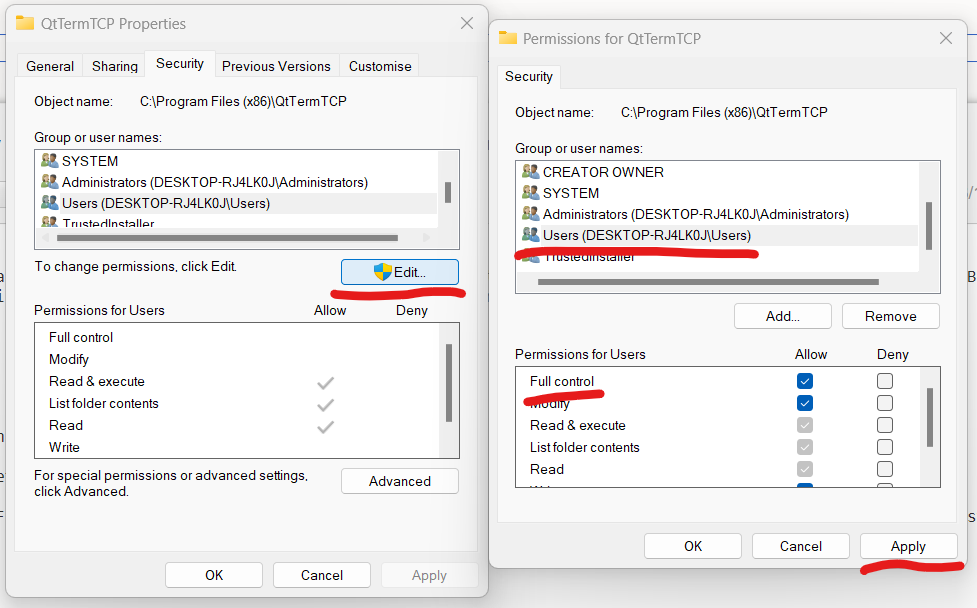
Right click it, go to properties and hit the Security > Edit which will open another window. Scroll down in the list of Groups or user names Until you find Users, highlight it and then Click Allow for Full Control then press Apply and exit the edit window.
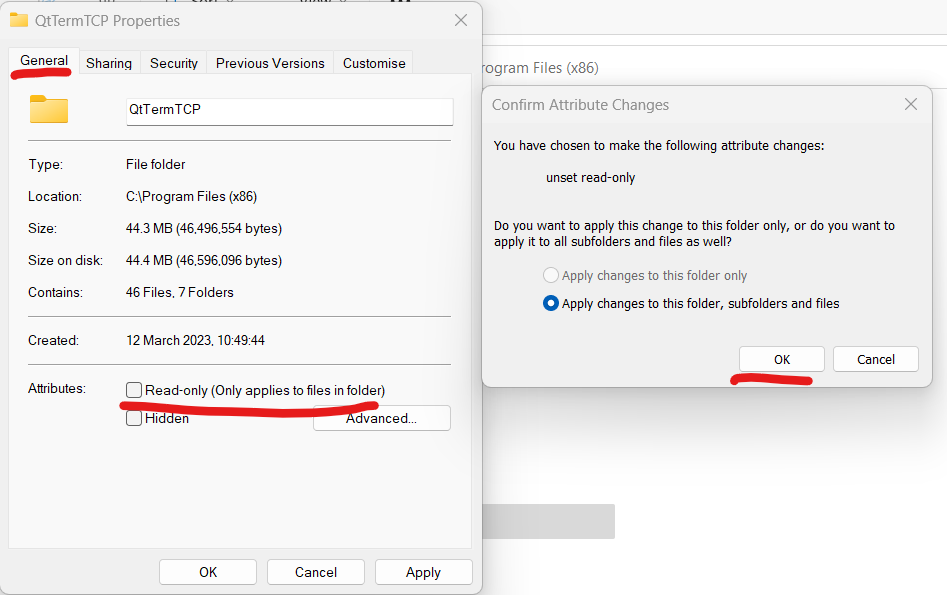
Click the General tab, Untick Read Only press Apply Then Ok when prompted to Apply changes to this folder, subfolders and files
You can then exit the properties window.
To access if from the Start Menu, Find QTTermTCP.exe, Right Click it, and select Pin To Start.
Optionally if you want to create a desktop shortcut, you can also Right click the exe again, select Show more options > Send to > Desktop (Create Shortcut)
This completes the installation.
Ubuntu 22.04
Tom M0LTE has kindly setup some Github actions for building QTTermTCP for 64 bit Linux. The subsequent compiled binary can be found here
First of all open a terminal, change to root, and install the dependencies:
su root
apt-get update
apt-get install libqt5serialport5 libqt5widgets5

Next download the binary and make it executable:

<code>
wget -P /usr/local/bin https://github.com/M0LTE/QtTermTCP-builds/releases/download/release/QtTermTCP
chmod +x /usr/local/bin/QtTermTCP
Then create a .desktop file so you can find QtTermTCP in your applications menu.
nano /home/$USERNAME/.local/share/applications/QtTermTCP.desktop
Enter the following:
#!/usr/bin/env xdg-open
[Desktop Entry]
Version=1.0
Type=Application
Terminal=false
Exec=/usr/local/bin/QtTermTCP
Name=QTTermTCP
Comment=QTTermTCP
Then press Ctrl + O to save and Ctrl + X to exit nano.
You should now be able to launch QtTermTCP from the “Applications” menu
Raspbian Desktop
NOTE: the following instructions work exactly the same for Ubuntu 22.04
QtTermTCP can be compiled for a Raspberry Pi. From a fresh install run the following commands:
# First let's install the support packages.
sudo apt-get install -y qt5-qmake qtbase5-dev libqt5serialport5-dev git

# Move to the user's home folder and create a source folder.
# If it already exists, it's ok.
cd
mkdir -p src
cd src

# Download the source code.
git clone git://vps1.g8bpq.net/QtTermTCP
cd QtTermTCP

# We want to do a shadow build so it's easy to update later
mkdir build
cd build
qmake ..

# NOTE: older Pi's like 2's and 3's will want to use a "-j2" or "-j3"
# but Pi 4/400's can support the "-j4" just fine.
make -j4

# Now the executable will reside in the build folder so let's
# make a tidy home for it as a folder in our home folder.
mkdir -p ~/QtTermTCP
cp QtTermTCP ~/QtTermTCP
cd ~/QtTermTCP

# Ensure the program is executable.
chmod +x QtTermTCP

# Now make a simple script to use for a desktop shortcut or manually starting the program.
touch QtTermTCP.sh
echo "#!/bin/bash" > QtTermTCP.sh
echo "cd ~/QtTermTCP" >> QtTermTCP.sh
echo "./QtTermTCP > /dev/null & 2>&1" >> QtTermTCP.sh
echo "exit 0" >> QtTermTCP.sh
chmod +x QtTermTCP.sh
The program may be run using the shell script found at /home/<user>/QtTermTCP/QtTermTCP.sh
This shell script may also be used to build a shortcut for the desktop. For RPi, open the File Manager and find the QtTermTCP.sh file. Drag the file to the desktop and drop it. For other Linuxes, the desktop shortcut creation may be different.
Setup
Setup should be similar for both Windows and Linux versions. Note of the 3 connection methods documented below, you'd generally only configure one - so pick the method most relevant to your setup.
KISS via Serial
KISS (Keep It Simple, Stupid) is a protocol for communicating with a serial terminal node controller (TNC) device used for amateur radio. An example of a modern TNC is the NinoTNC.
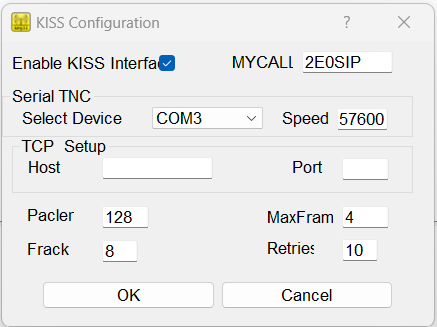
Open QTTermTCP, click Setup > KISS Setup.
Tick Enable Enable KISS interface, enter your callsign.
In the Serial Setup section select the COM port of the attached TNC, and enter the desired baud rate (Note: This is the baud rate of the serial device itself, not the baud rate you wish to transmit at). The Baud Rate for the NinoTNC is 57600.
KISS via TCP
KISS Over TCP is useful if you're running QtTermTCP and want to connect to Dire Wolf, which is either running locally, or perhaps running on a Raspberry Pi and you want to connect from QtTermTCP running on your daily driver PC.
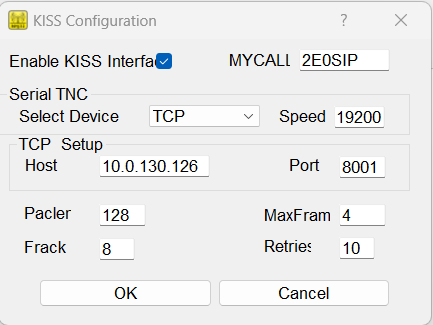
Open QTTermTCP, click Setup > KISS Setup.
Tick Enable Enable KISS interface, enter your callsign.
In the Serial Setup section select “TCP” in the drop down for Serial Device.
In the TCP Setup section enter the IP and port of the KISS modem. If you're running Dire Wolf on your local machine the IP would be 127.0.0.1. Dire Wolf listens on port 8001 for KISS by default.
It should look something like:
Press OK when finished to exit the setup.
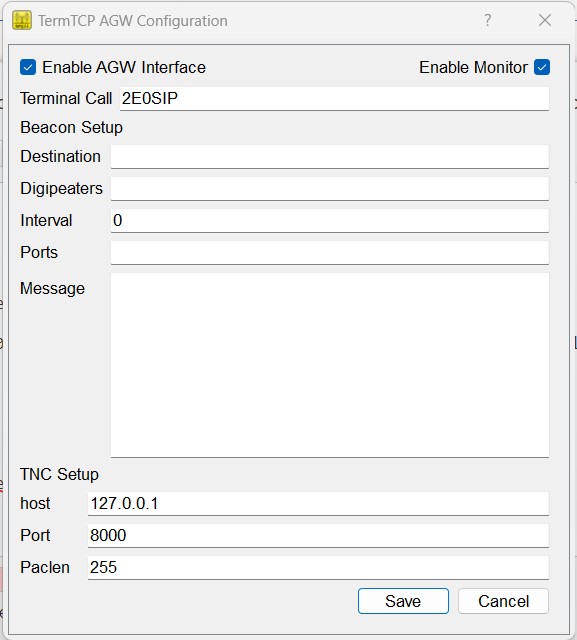
AGW
AGW is a packet protocol used by in SV2AGW's collection of packet software. It can be used to connect to software modems like QtSoundModem.
To configure it, open QTTermTCP, click Setup > AGW Setup.
Enter your callsign, ignore the Beacon setup for now, and then in the TNC Setup section configure the Host, Port, and Paclen. If you're using QtSoundModem on the same machine, the host is 127.0.0.1 and the default port is 8000.
Usage
Once you've configured QTTermTCP you can try to connect to something.
KISS
Open QTTermTCP. Assuming everything is setup correctly you should see “Kiss Connected” in the bottom status bar.
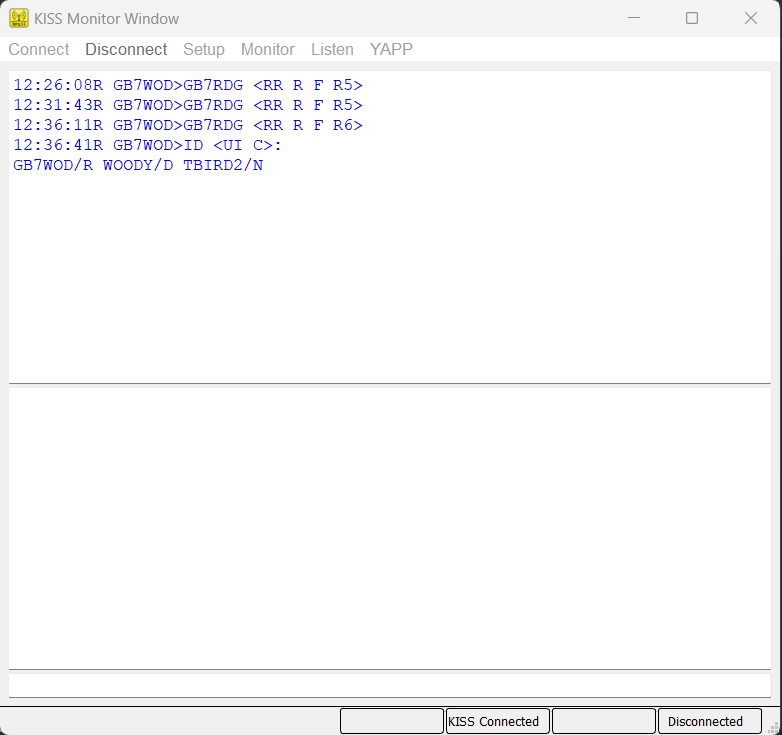
By default, the windows is split into three. The top panel is monitoring any packets sent or received. If you're in range of another packet station you should see some activity here. The Middle panel is there terminal and will show any data sent from a node once connected. The bottom small text bar is for sending text to a connected node.
Monitor panel showing some activity from GB7WOD:
To attempt to Connect, in the top bar select Connect > KISS Connect and enter the call sign of the station you wish to connect to. Digis can usually be left empty if you're in direct range of the node you're connecting to.
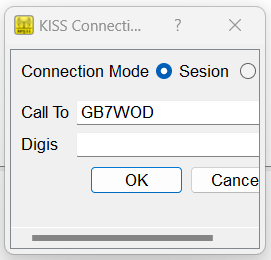
Press OK once finished to connect
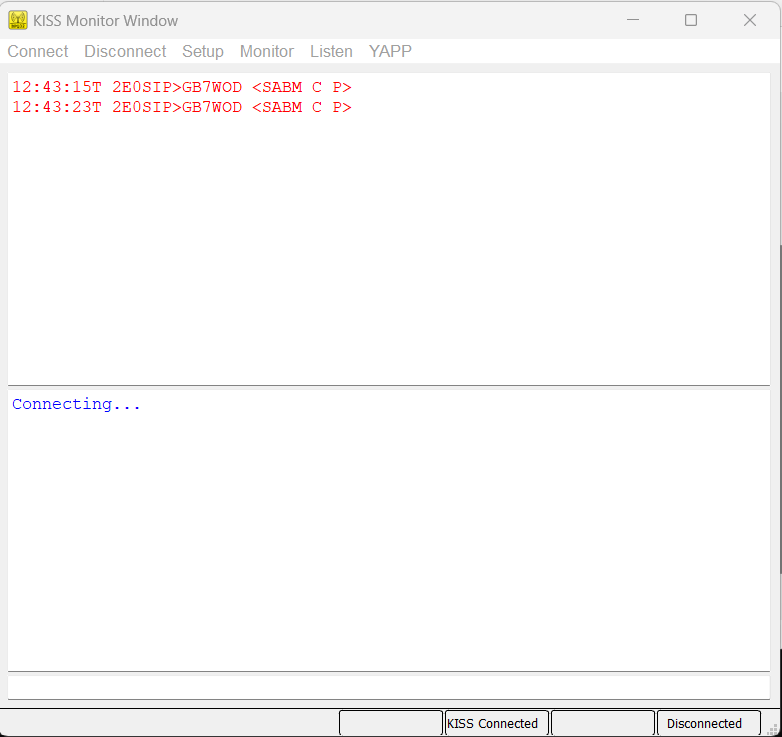
You should then attempt to connect to the node. You can see the sent packets in the monitor window.
Once connected, you can start to interact with the node.
AGW
Open QTTermTCP. Assuming everything is setup correctly you should see “AGW Connected” in the bottom status bar.
To attempt to Connect, in the top bar select Connect > AGW Connect and enter the call sign of the station you wish to connect to. Digis can usually be left empty if you're in direct range of the node you're connecting to. You'll also have to select the radio port. For a single modem connection this will be the first in the list.
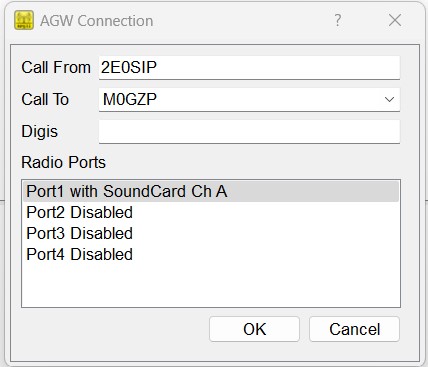
Press OK once finished to connect. You should then attempt to connect to the node. You can see the sent packets in the monitor window.
Once connected, you can start to interact with the node.