
This is an old revision of the document!
Table of Contents
Jonathan GI3JMC's WAOARC Kit Build
Software Saga - Part 1
After the 2025 Worked All OARC kit was presented on Sunday 20th July, and the order link was published, I immediately ordered it then started wondering what to use it on. I settled on the following bits which landed on my doorstep on Tuesday 22nd July (well done PiHut!):
- Raspberry Pi Zero 2W
- Waveshare UPS Hat
- Raspberry Pi Power Supply
- Colour-coded GPIO header
I managed to get the GPIO header soldered into place the right way round and bolted the UPS hat into place.

I rummaged in the 'little parts' box and found an 8Gb MicroSD card, and used the Raspberry Pi Imager to put the current 32-bit 'Lite' version of Raspberry Pi OS onto the card, checking that the customization settings were setting the Pi's network name, adding my WiFi details, a username, and a password.
Once the card was written I put it into the Pi Zero 2W and started it up. The first startup takes a little while as the system resizes itself to use all available space on the MicroSD card, so I went and got myself some coffee.

Once the coffee was finished, I opened a command line and connected to the Pi using ssh. My username is jonathan and the pi is wspr-pizero2.
ssh jonathan@wspr-pizero2
Now that the Pi is running and I've connected to it, I updated it with sudo apt update && sudo apt upgrade -y and restarted it with sudo systemctl reboot.
I reconnected via ssh again, and started to install the software to run the OARC-designed WSPR WithOut Tears hat, called wsprrypi, folling the instructions at https://wsprry-pi.readthedocs.io/en/latest/Install/index.html#install-wspr
The command curl -fsSL installwspr.aa0nt.net | sudo bash started to download and run the install process, which took between 15 & 20 minutes on the Pi Zero 2, with 9m30s spent compiling the actual software. Once it finished I restarted the Pi for good measure.
After the restart a webpage was available at http://wspr-pizero2/wsprrypi to configure and enable the transmissions. I entered my callsign and saved the page, not yet flipping the transmit enable switch. That needs to wait until I receive and build the kit & filter.

The Hardware Interlude.
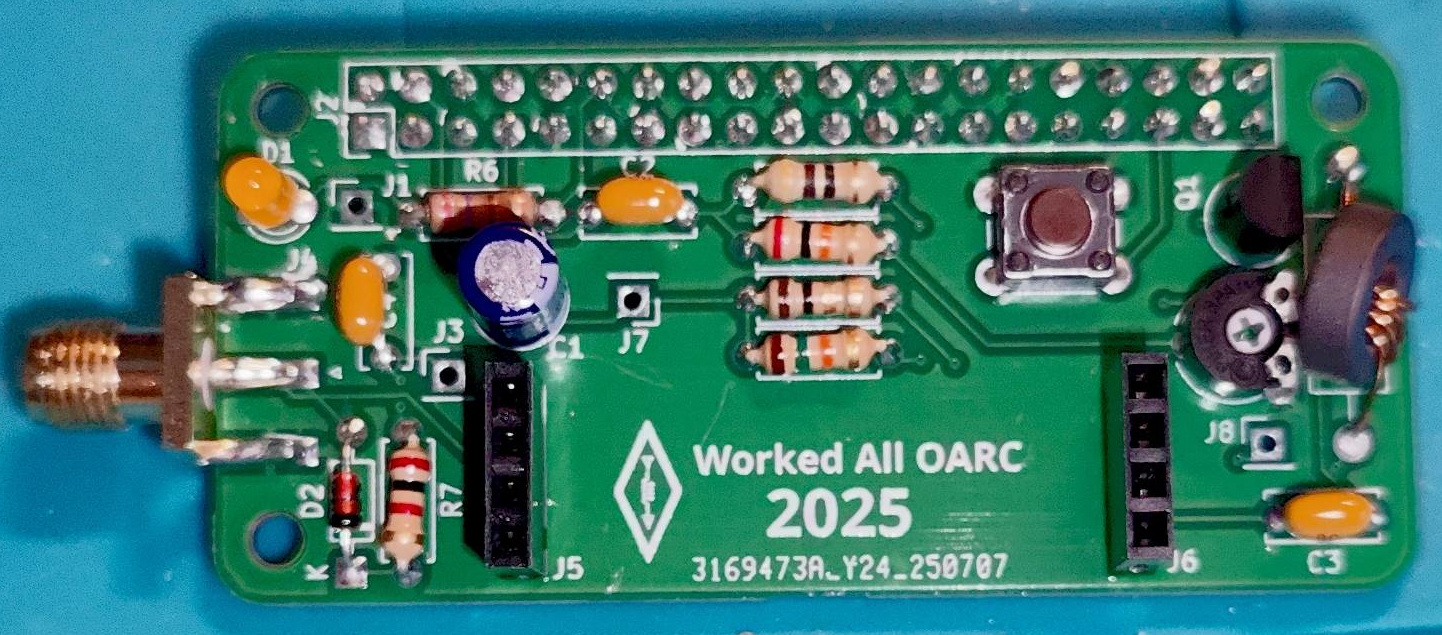
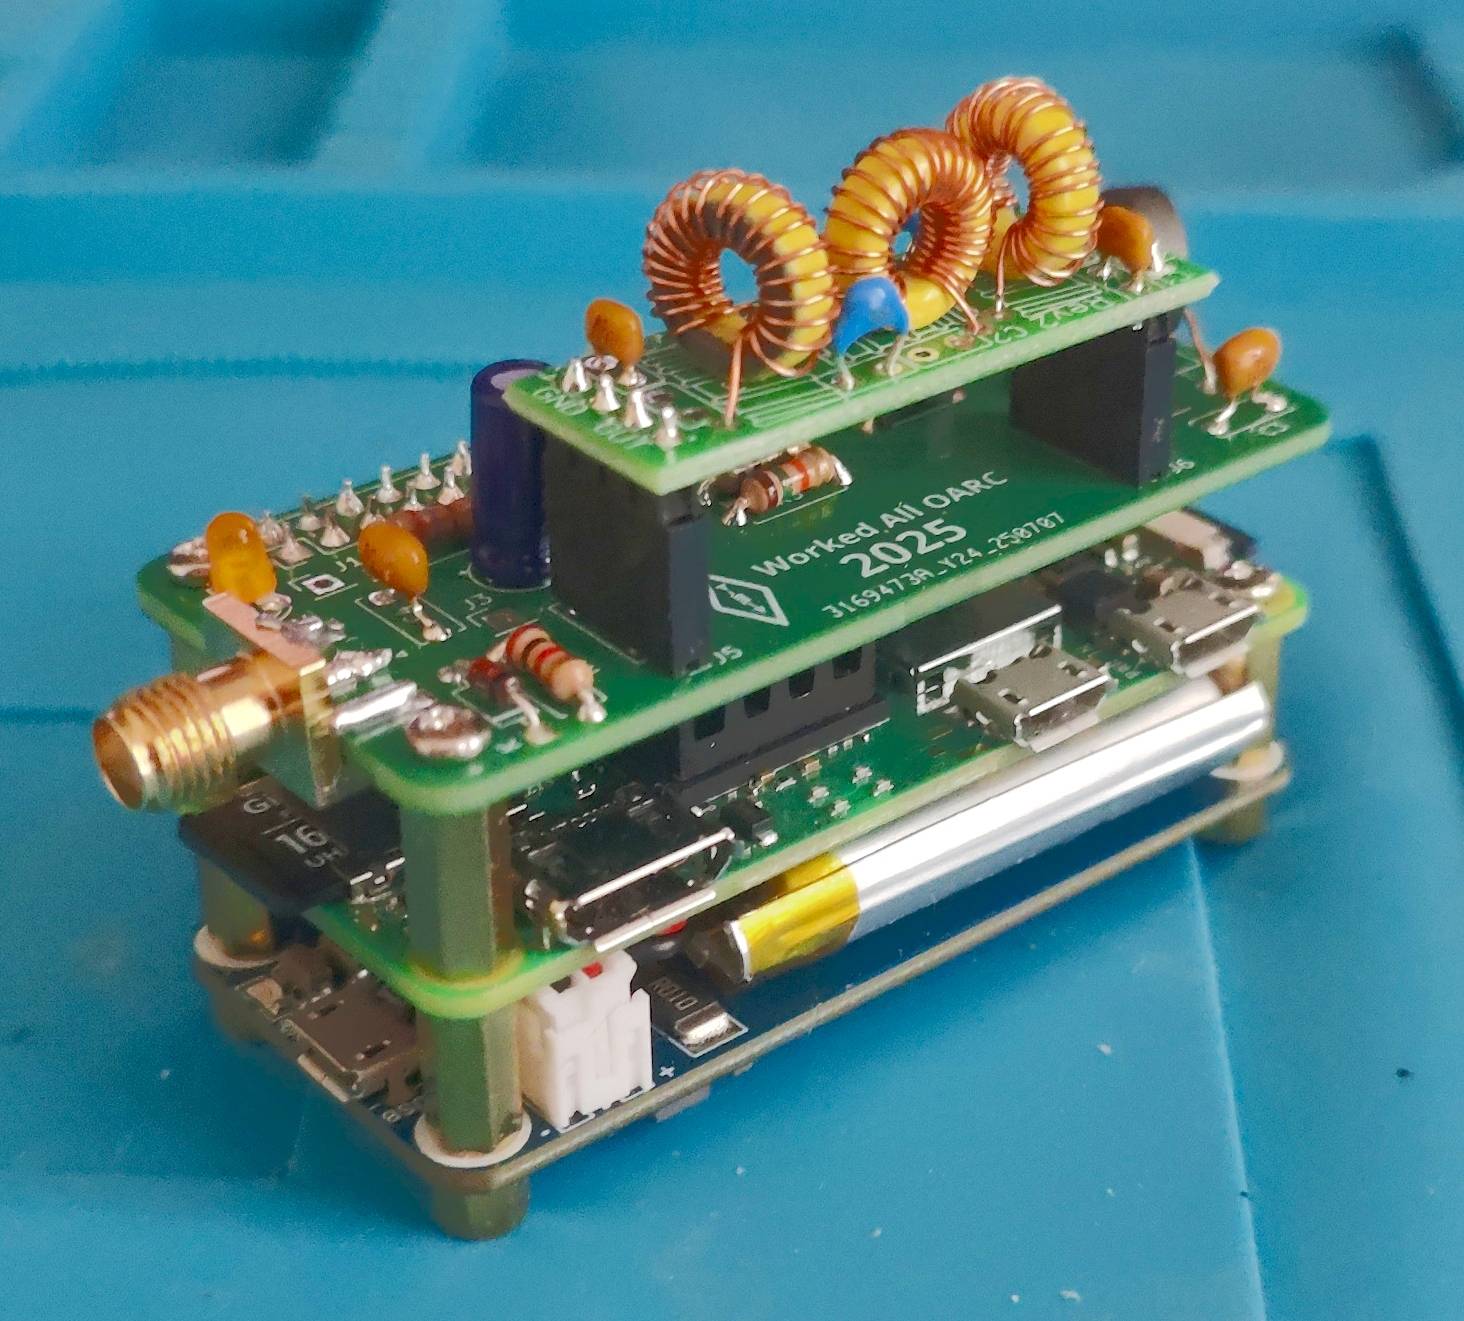
I was one of a small group of super secret testers and my kit was delivered on Saturday 26th July. Following the excellent guide created by Eoin M0NVK, putting the board together was pretty straightforward. Another pair of hands to hold the board and 1×4-pin sockets in place for soldering would have been welcomed.
I did have to break out the magnifying headset to fit the transitor. The pads for it are teeny tiny, and really close together. The magnifying headset was also useful to see the black stripe on the little signal diode
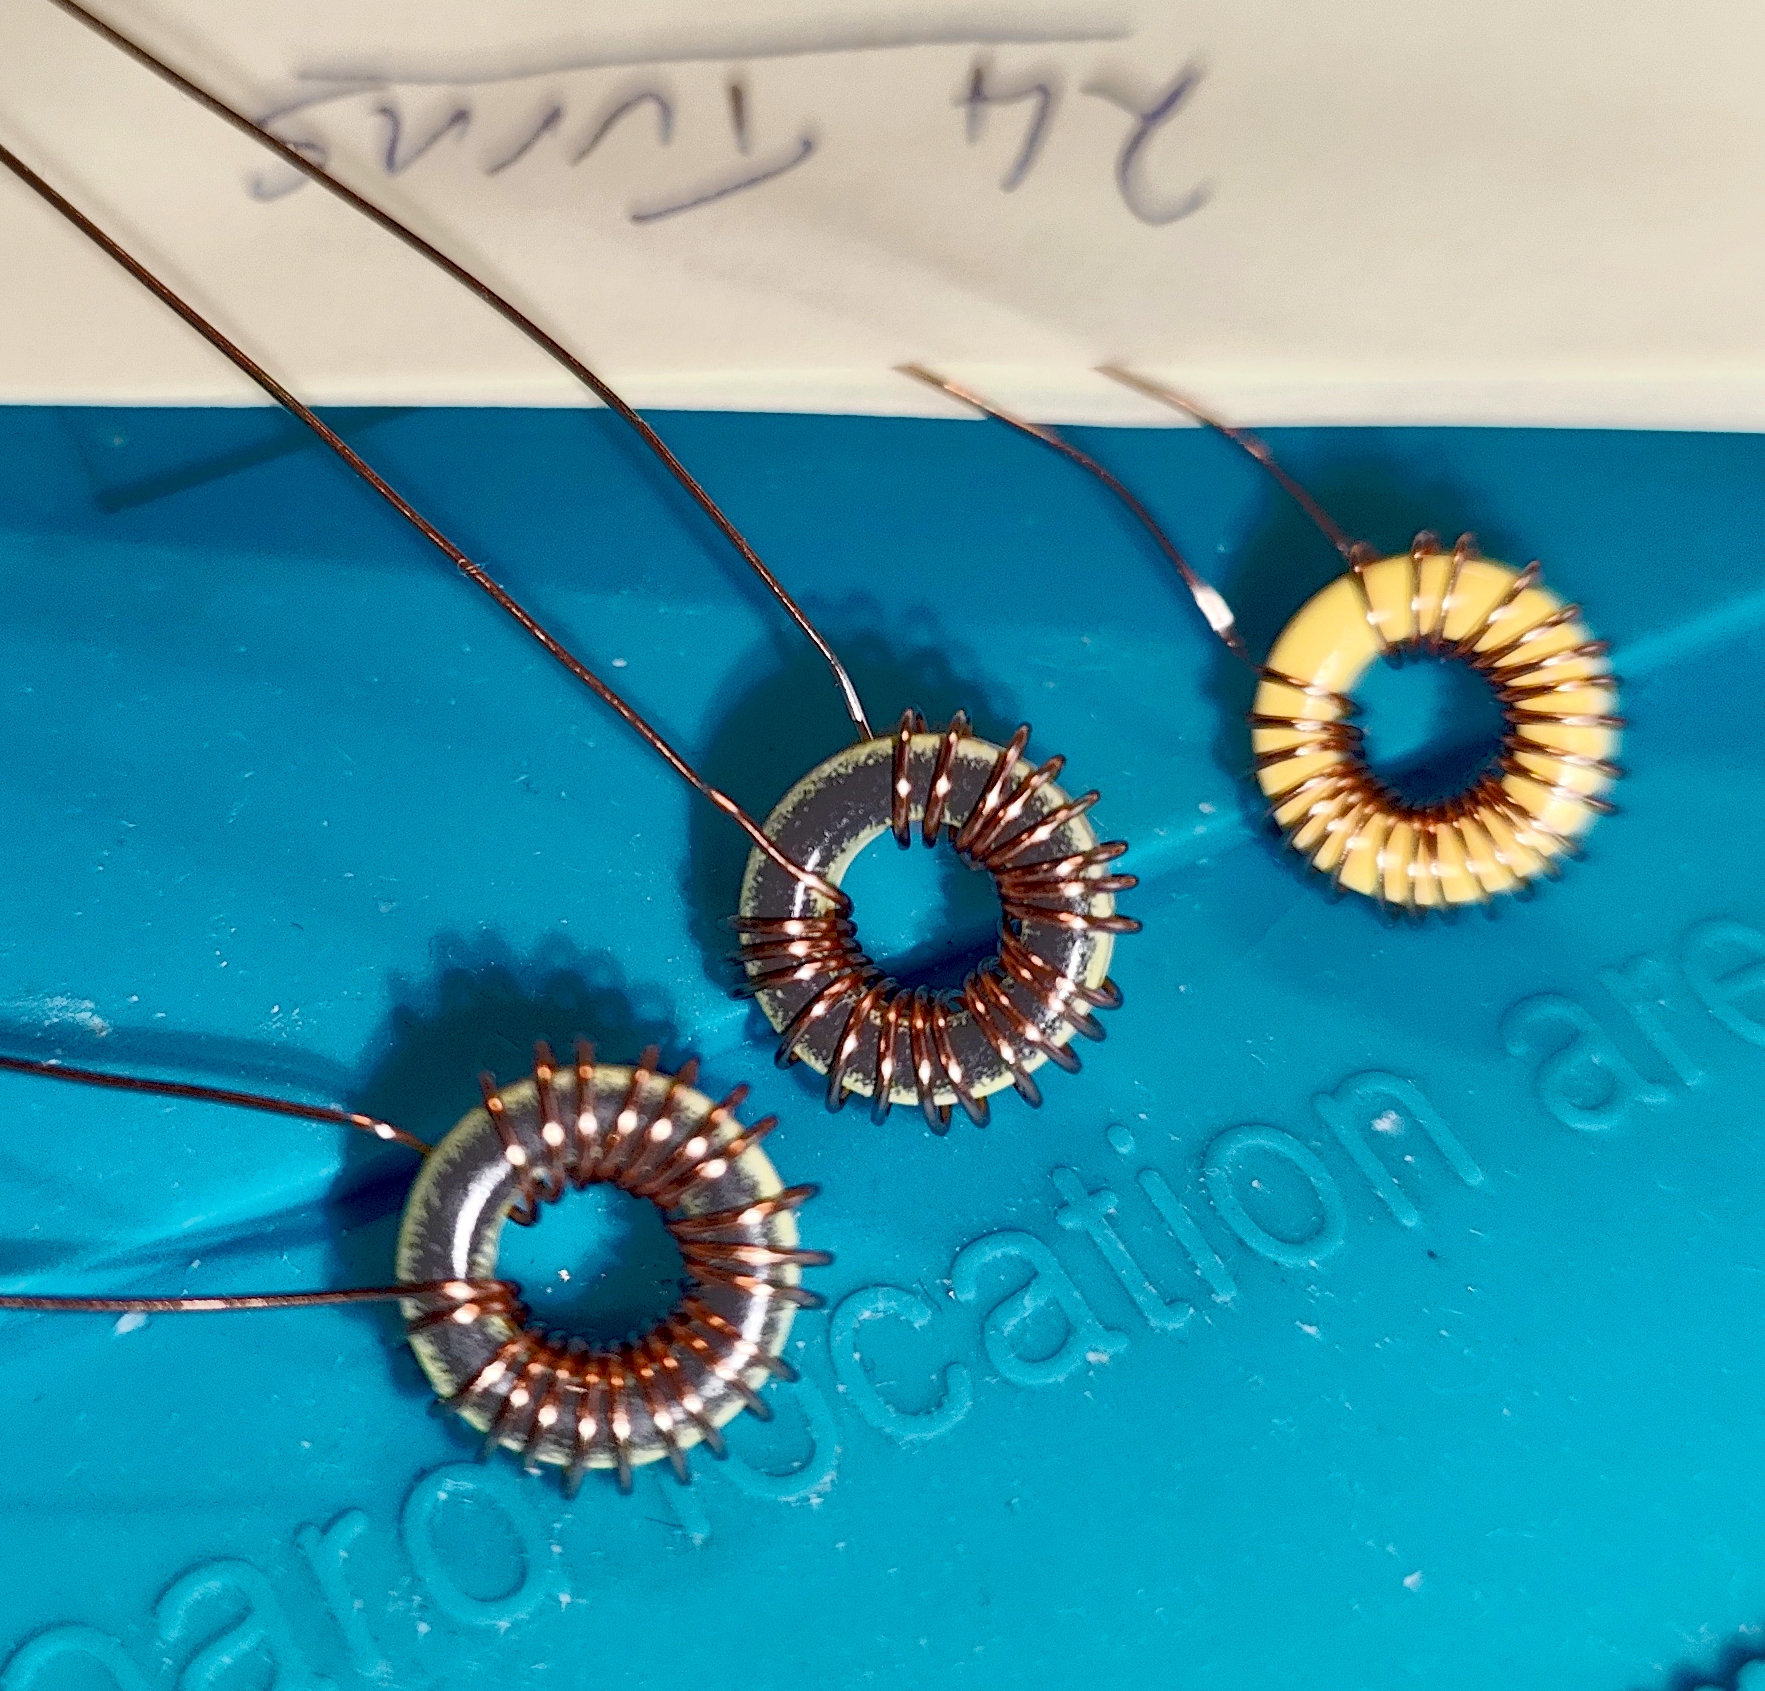
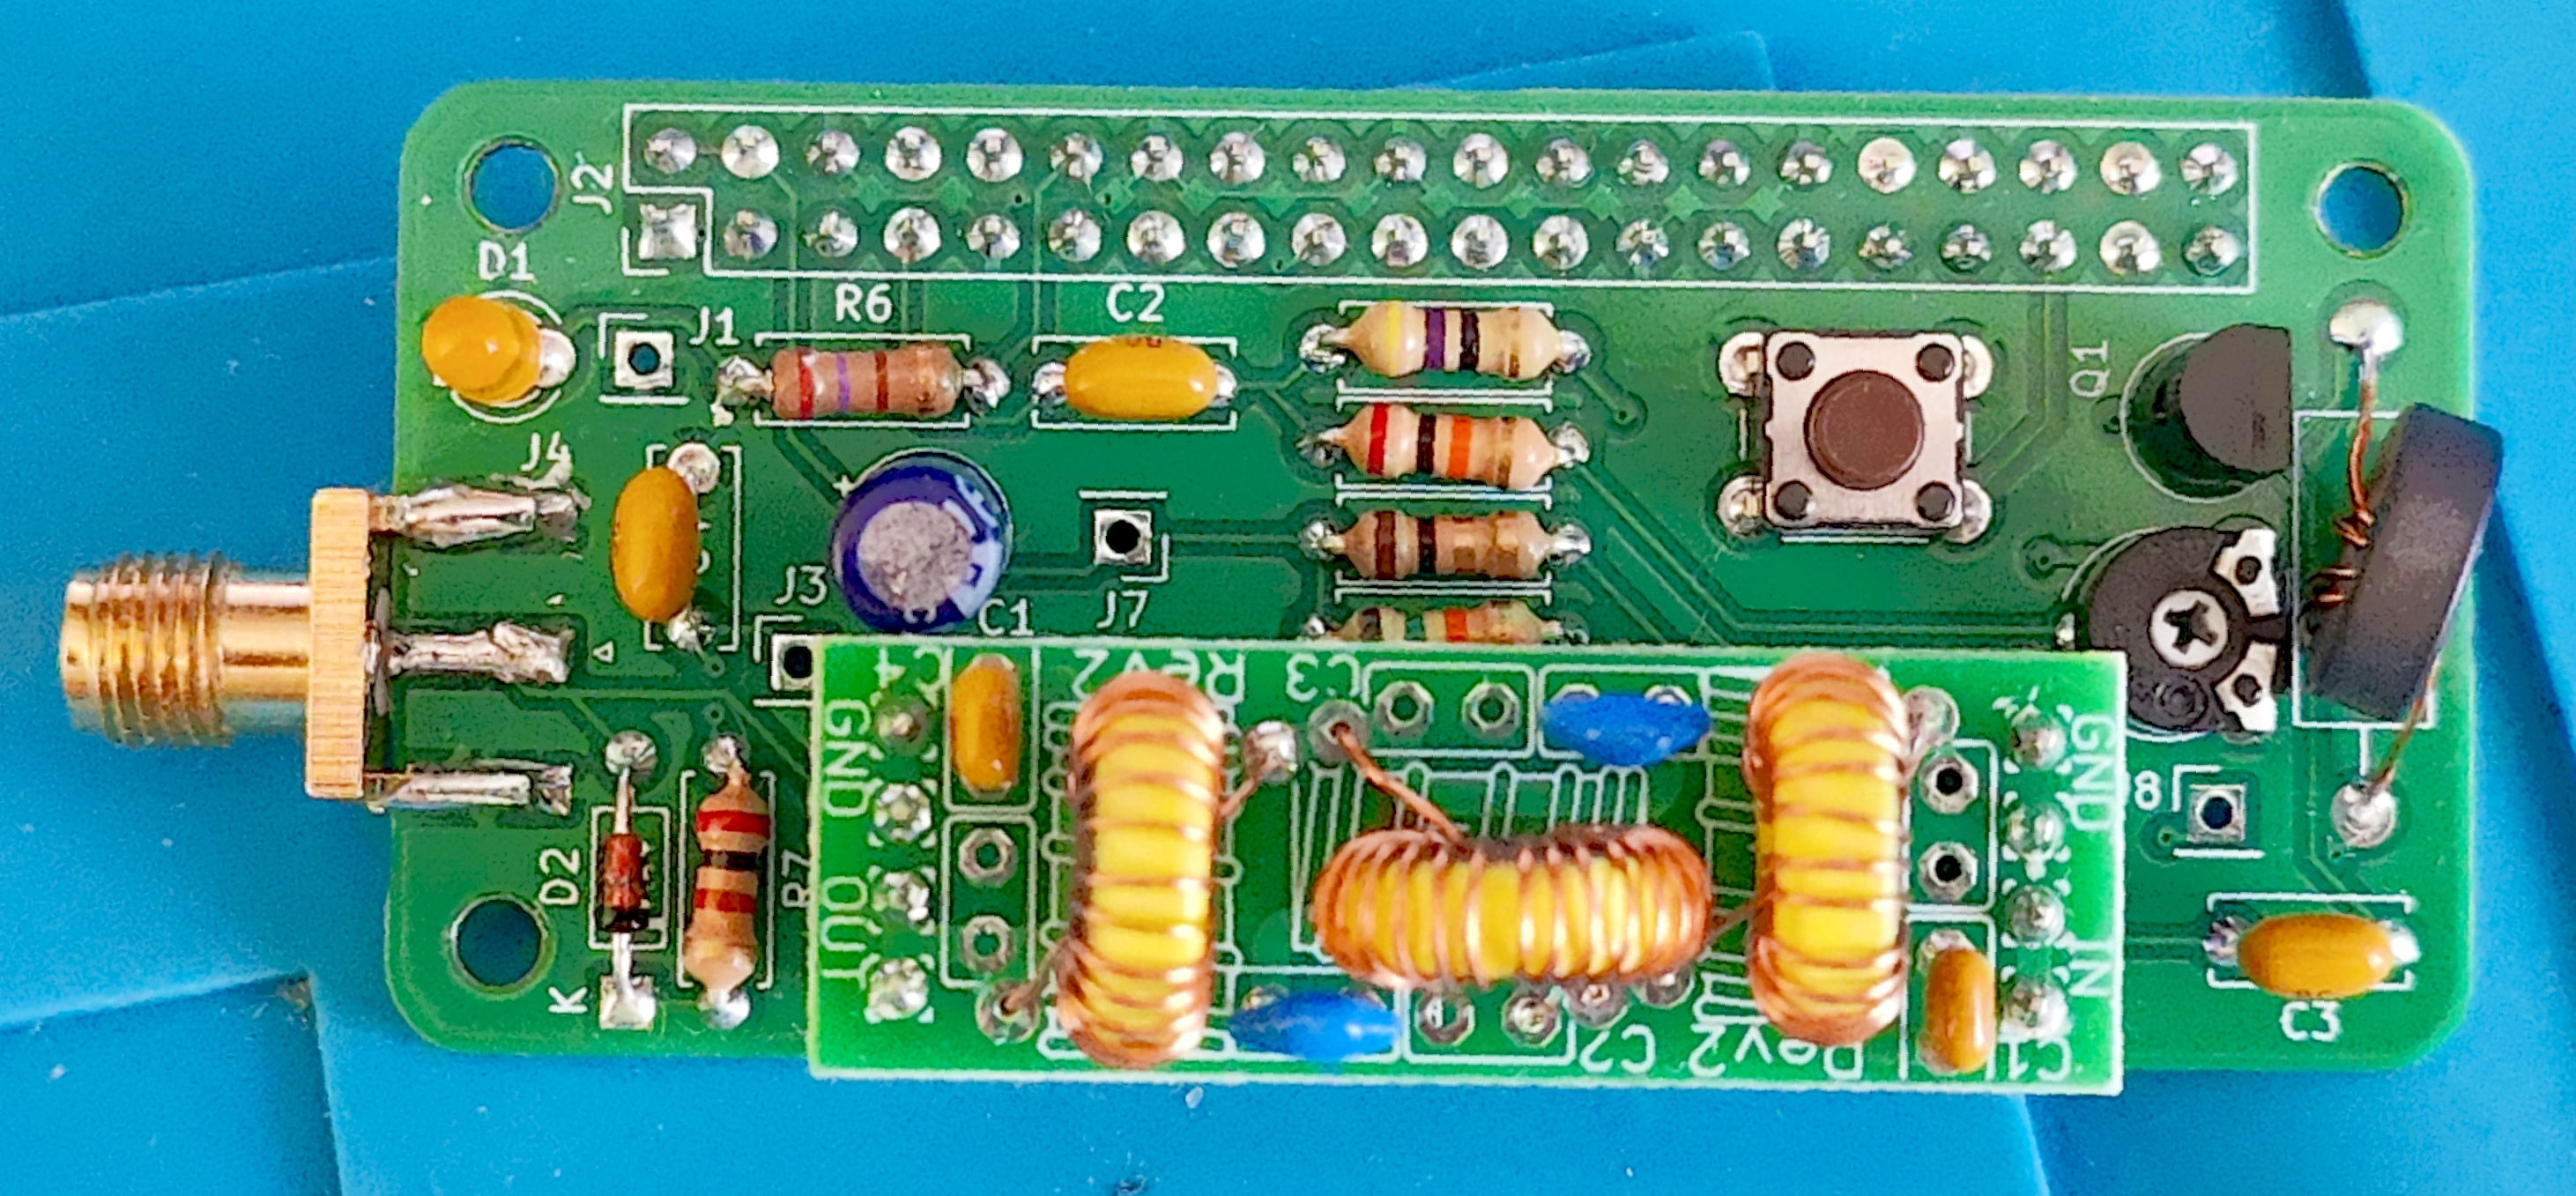
I requested a 40m filter from QRPLabs along with the kit, and it arrived with components nicely contained in a separate ziplock bag. The guide that is available from QRPLabs for the filter construction is very comprehensive and covers all of the bands that the filter board supports, with the values for each band given in tables showing the capacitor values and inductor wire turns to use.
I did have some head-scratching trying to figure out the capacitor mounting. Each end of the board and the middle of both long sides has positions for two capacitors. It took some careful reading of the manual and probing with a multimeter to determine that the closest pads in each pair of positions is connected, and so are the ones at each end. Some bands will require a pair of capacitors in parallel, but the layout also allows for a single capacitor with wider leg spacing to be fitted, straddling a pad.
Having a diagram of the board layout showing the tracks would have been really helpful.
| |  |
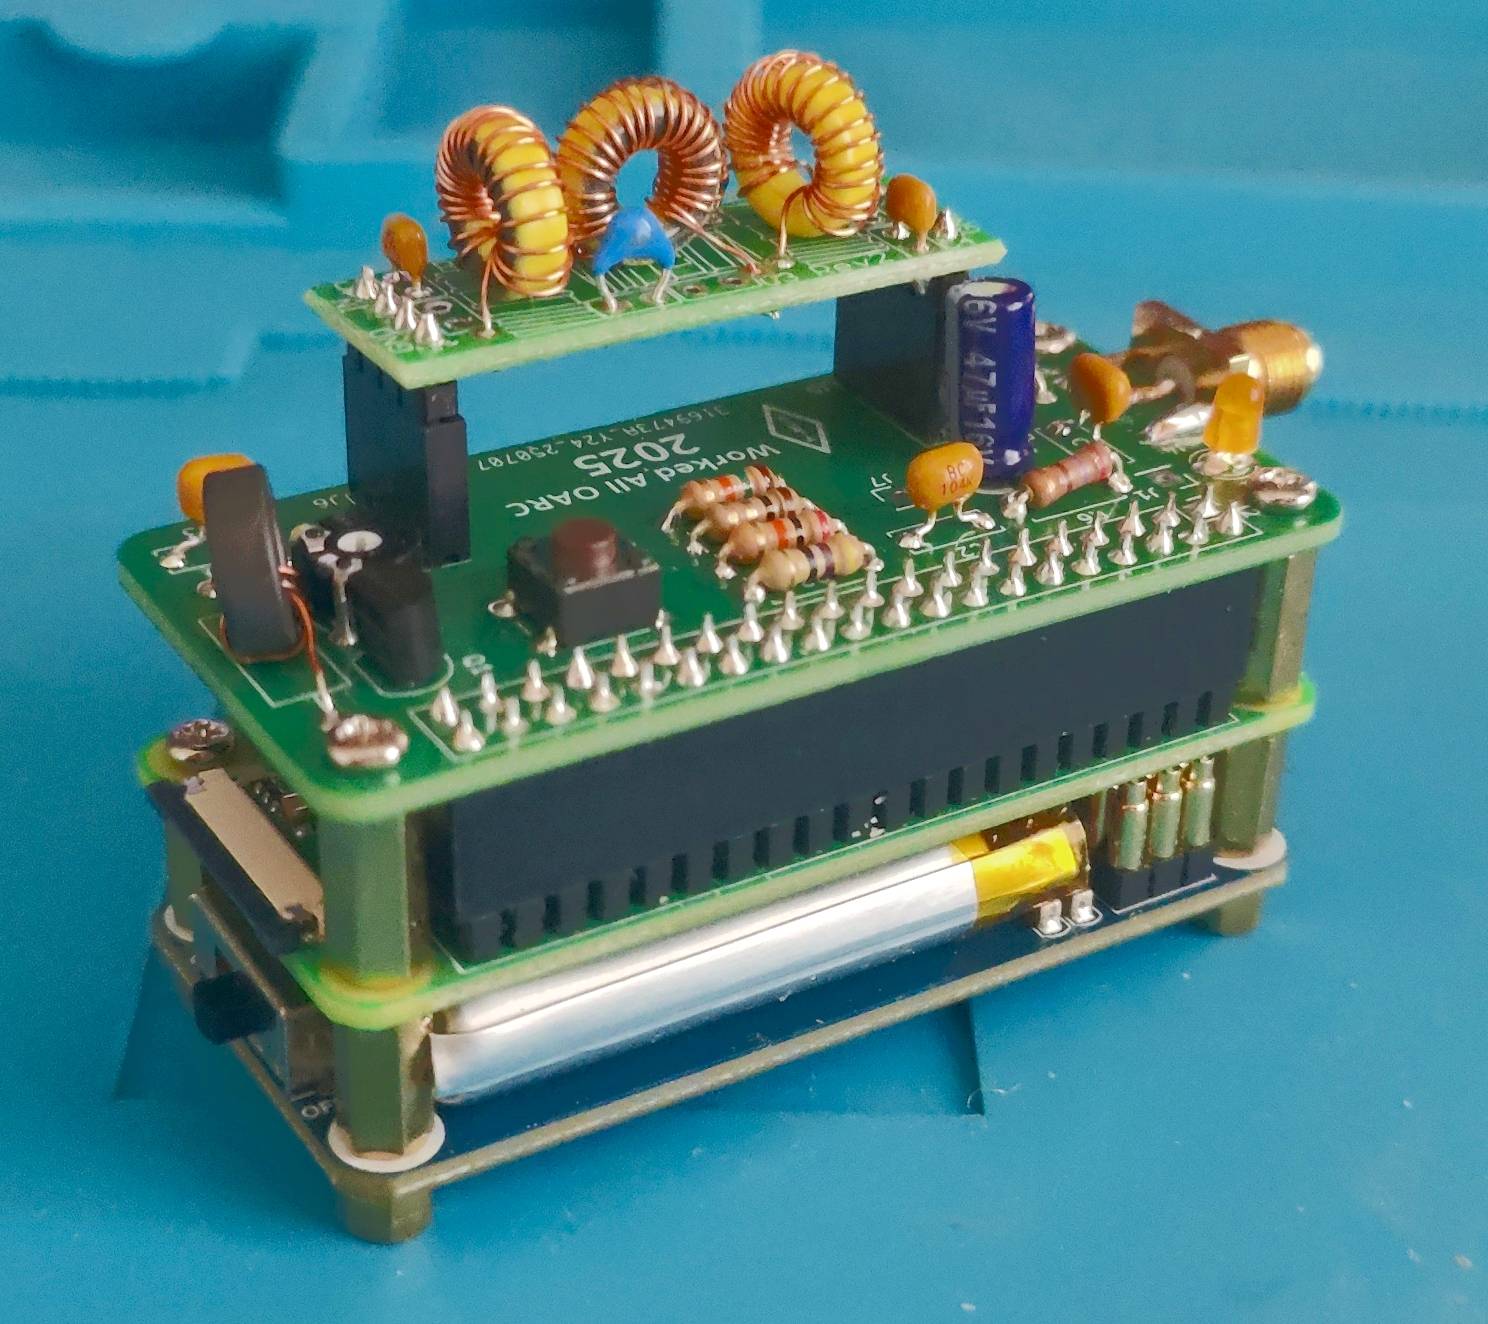
All that was left to do was connect the filter to the board, add an antenna, and attach the completed assembly to the Pi.
 |  |
Software Saga - Part 2
Debugging here