Table of Contents
Installing LinBPQ on a Raspberry Pi
This is a document which describes the general case of installing and configuring LinBPQ on a Pi - this is probably not the instructions to establish a node specific to the OARC national packet project network.
NB this process has now been superseded since one of our members has kindly established an apt repo containing a build of LinBPQ.
See linbpq-apt-installation for a guide.
Assumptions
This process assumes you know how to flash an SD card with the latest version of the Raspberry Pi OS and you have SSH access to your Pi.
Nothing being installed requires a graphical interface so the minimum non-graphical interface is my [Francis M0UKF] preference - but it's up to you
Downloading and running the script
Log into your pi
When you issue the following commands, a script will be download, that script create a folder called linbpq and download and install a pi version of linbpq. I personally run it from my home folder - so it is installed in /home/pi/linbpq
wget http://www.cantab.net/users/john.wiseman/Downloads/installLinBPQ
chmod +x installLinBPQ
./installLinBPQ
Congratulations you now have linpbq!
Setting up linbpq - the bpq-config tool
Before you can use linbpq you need a configuration file called bpq32.conf.
The configuration file tells linbpq how to interact with your TNC/Radio, it's web interface and any other connections such as internet links or Telnet connections.
You will also need a few other applications, such as telnet, minicom and lsof.
The following tool will take care of this and create a basic configuration file, which we can then edit it to make it suited to our needs
Run the following commands from within your linbpq directory to download the tool
 wget http://www.prinmath.com/ham/bpq-config
 chmod a+x bpq-config
To launch the tool type:
sudo ./bpq-config
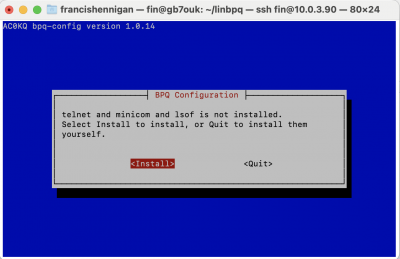
The script will make appropriate changes to your pi, just select the default options:
1. Install missing software
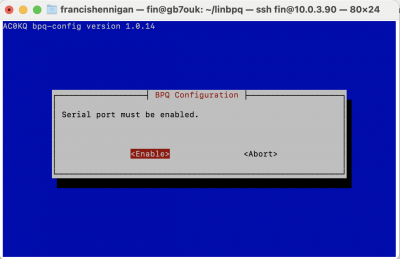
2. Enable serial port access [so you can access your tnc]
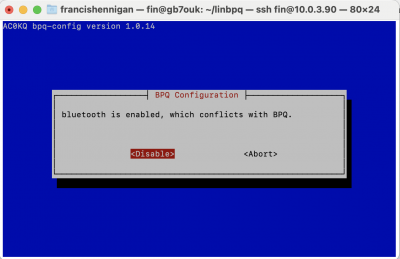
3. Disable Bluetooth [don't ask me why]
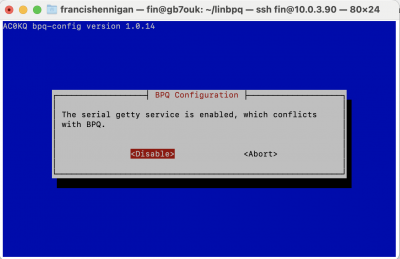
4. Let BPQ be attached to serial devices [so people connecting over your tnc can talk to bpq]
5. Reboot
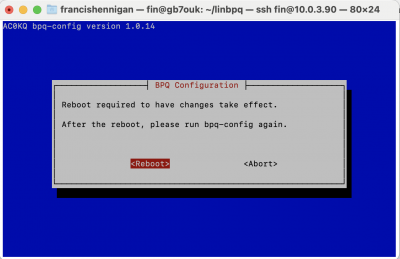
6. Once your pi has reset, reconnect to, nagivate to the linbpq folder and relaunch the configuration tool:
sudo ./bpq-config
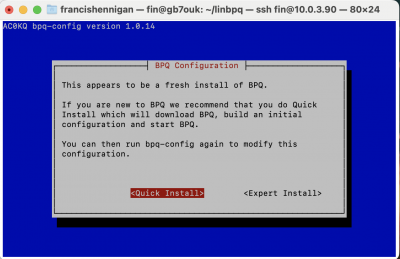
7. Select Quick Install - this will create a basic configuration that you can then change
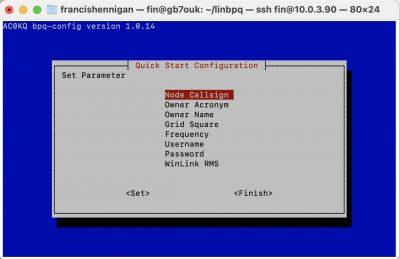
8. On the following screen go through each option and populate - things to be aware of:
- Gridsquare reference is your Maidenhead locator. The first 2 letters need to upper case, the last 2 lower case. So IO92PB is IO92pb
- Username/Password can be anything you like - you'll only use it when accessing the link over your home network
- Set WinLink RMS to No
9. Once done click finish. The script will update the appropriate files, hit ok to move on
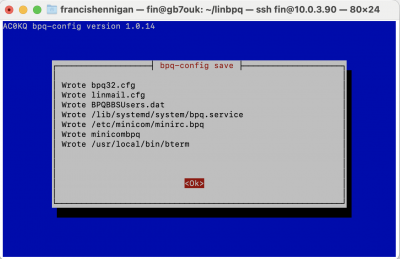
10. The following screen shows how you can connect to your bpq instances interface - maybe fire up a browser and have a look now!
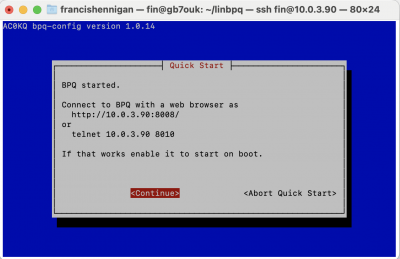
11. You will then be sent to the main menu, if you run the config tool again in future you will be brought here. Select option 5 to enable bpq on boot.
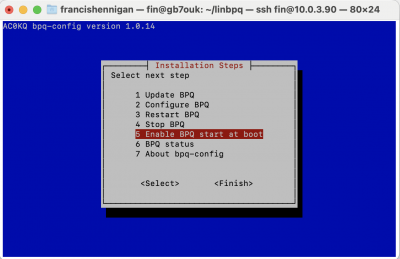
12. Click finish. Your bpq instance is setup! Why not visit the web interface! http://yourpiIP:8008
Connecting LinBPQ to your TNC
1. Find out which port your TNC is connected to:
- NinoTNC - It's /dev/ttyACM0
- Physical TNC connected by USB to Serial cable - Probably /dev/ttyUSB0
- Direwolf 'soundmode' - you can specify what “virtual port” it creates ask in #packet-and-networks channel on discord
2. Navigate to your linbpq folder.
2. Run the command sudo nano bpq32.cfg to open the configuration file
3. Spend a few minutes looking over this file. The tool we used has added a load of comments telling you what everything does.
4. Navigate to the section that starts *Port 1*
5. Change the COMPORT and SPEED to the correct values - in the case of a NinoTNC you would change:
 COMPORT=/dev/ttyACM0                          ; Serial port
 SPEED=19200                                   ; Serial port speed
to:
 COMPORT=/dev/ttyACM0                          ; Serial port
 SPEED=57600                                   ; Serial port speed
6. To save your changes - Press Ctrl + X to exit the text editor. The bottom of the screen will ask if you want to save changes. Press 'Y' then enter.
7. To load in changes restart linbpq with the following command: sudo systemctl restart bpq.service
8. If you want to check if linbpq has started type sudo systemctl status bpq.service The first 3 lines of the output should look like this - If it says “active (running) on the third line, you are good to go!
   bpq.service - BPQ
   Loaded: loaded (/lib/systemd/system/bpq.service; enabled; vendor preset: enabled)
   Active: active (running) since Thu 2023-01-05 10:49:04 GMT; 1min 34s ago
Suggestion: run as non-root
The script above runs bpq as the root user, which is generally considered to be bad practise. I made the following changes to make it run as my normal pi user (szymon):
1. Run the following command to stop the bpq service:
sudo systemctl stop bpq
2. Run the following command to change ownership of all the configuration files:
sudo chown -R szymon:szymon ~/linbpq
3. Edit the systemd configuration for bpq using sudo, for example with:
sudo nano /lib/systemd/system/bpq.service
and update the file to include user and group information in the [Service] section:
[Service]
User=szymon
Group=szymon
4. Run the setcap command to allow access to lower ports and captures as needed:
sudo setcap "CAP_NET_ADMIN=ep CAP_NET_RAW=ep CAP_NET_BIND_SERVICE=ep" ~/linbpq/linbpq
5. Restart the bpq service:
sudo systemctl start bpq
What Next? Access your node
You can access your node via radio and over your home network [and potentially the internet] via a telnet client.
It's better to use a dedicated telnet client but linbpq does provide a web based one. You can access it by clicking “Terminal” on your nodes webpage - located at http://piIPAddress:8080 - if you take this route skip steps 1 & 2
- Download a telnet client - Putty for Windows, “telnet” for pi/linux or TelNet Lite from the Mac OS App Shop
- Setup a connection to your pi, enter your pi IP address as prompted and port 8010
- Hit connect and you'll be prompted for your username and password [set above]
- Once connected you can type ? followed by enter to get commands
- Type BBS to access the BBS/Mailbox system
- Type ? for help
- If you have a second tnc, if might be fun to send yourself a message. Use the command 's callsign' and follow the prompts eg 's M0UKF'
You can also access your node via G8BPQ's desktop application QtTermTCP. Enable an FBBPORT inside your Telnet port config, and set up a host in QtTermTCP, pointing at that port.
Problems
I installed and ran bpq.service but I get in my /var/log/syslog:
/home/pi/linbpq/pilinbpq: error while loading shared libraries: libconfig.so.9: cannot open shared object file: No such file or directory
Run:
sudo apt install libconfig9
