
This is an old revision of the document!
Table of Contents
WAOARC 2025 WSPR Kit Build - TAPR Software Preparation Guide
This guide will walk you through preparing a Raspberry Pi to work with the WSPR Hat Kit.
Prerequisites
You will need the following items:
- A Raspberry Pi 2, 3, or 4
- A Power Supply suitable for your Pi
- A MicroSD Card
- A MicroSD Card Reader
- A PC (Windows/Mac/Linux) to prepare the MicroSD Card
- A wired Ethernet connection to your network
- Your WiFi network name and password (If you wish to use WiFi)
- A WiFi Adapter (Only if you want to use WiFi with a Pi 2)
 The MicroSD card you use for this project will be completely erased during the process. Please make sure that it does not contain any data you wish to keep.
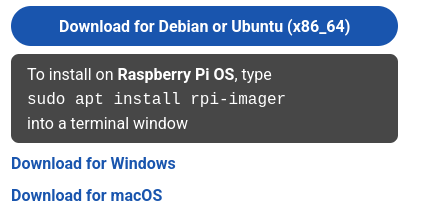
1. Download and install the Raspberry Pi Imager from https://www.raspberrypi.com/software/. If your computer type is not highlighted in the blue button, use the blue link that matches your system under the black box, as in the picture to the right.
2. Download the TAPR image using the links below that match your Raspberry Pi:
- For Pi 2, & 3 WSPR SD Card Image for Pi 2/3
- For Pi 4 WSPR SD Card Image for Pi 4
We recommend the newer WsprryPi software. These TAPR images are very out of date.
3. Insert the MicroSD card into your card reader and connect it to your computer, and open the Raspberry Pi Imager application.
4. Click the 'CHOOSE DEVICE' button on the left, and choose the option 'No filtering' at the top of the list.
5. Click the 'CHOOSE OS' button in the centre, and scroll down to the bottom and select 'Use custom'. Navigate to and select the TAPR image you downloaded in step 2.
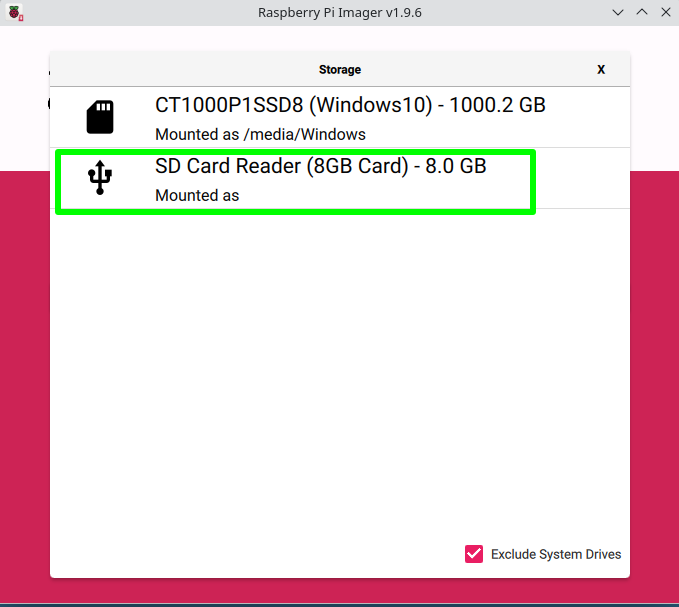 6. Click the 'CHOOSE STORAGE' button, and select your MicroSD Card from the list. Be careful to choose the option that matches your MicroSD card. Common card sizes are 8Gb, 16Gb, 32Gb, or 64Gb.
 7. Click the 'NEXT' button that appears in the lower right corner to continue. When asked if you would like to apply OS customisation settings, click 'NO'.
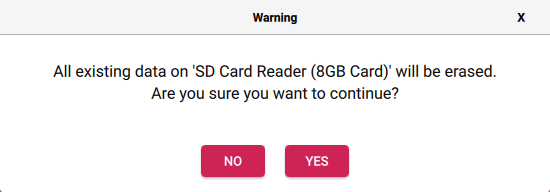 8. You will be asked to confirm that you want to erase all information on the MicroSD card. This is your last chance to stop the process. If you are sure that you want to proceed, click 'YES'. Depending on your system, you may be asked for your password, or to confirm the writing of the card.
After completing step 8, the Imager application will write and verify the card. This may take a while. When prompted, you can remove the MicroSD card and close the Imager application.
WSPR Software Configuration
 1. Insert the SD Card to the Raspberry PI, plug in the Hat, the Ethernet cable, and the power cable
2. The hostname for the Pi will be 'TAPR'. After waiting a few minutes for the Pi to start, visit http://tapr/ in your browser, and you should see the page to the right.
3. Enter your Callsign and Gridsquare, then set your wifi details if desired.
4. Set the band you wish to transmit on in metres (80m 40m 30m 17m 12m etc) and click the update button. The webpage will ask you to press the button on the hat to restart the Pi. If you have entered your WiFi details, you can disconnect the Ethernet cable at this point.
5. The transmitter should become active shortly after the Pi restarts (it waits for the next transmission cycle). If you have added WiFi details, check that the Pi can be accessed at http://tapr/ for any future adjustments you wish to make.
TAPR System Notes
- The default hostname is 'TAPR'. It cannot be changed prior to writing the card, and doing so afterwards is beyond the scope of this guide
- The default username is
piand the password iswspr. These are also pre-configured in the card image and cannot be adjusted. We have not investigated whether the password can be changed.
- Credit - https://tapr.org/product/wspr/